
If you’re a digital nomad based in the US, Mexico, or Canada, knowing how to install Starlink on RV will greatly change your access to the internet while on the move.
There’s no doubt that Starlink is arguably the best internet service in delivering internet coverage, even in remote areas.
Moreover, the Starlink RV option is a one-of-a-kind service that has made life for travelers a breeze.
Please read our article to see how you can benefit from this internet service and what it takes to be a subscriber.
What is Starlink RV?
Starlink is arguably the largest and most reliable satellite internet provider globally, with various packages, including Starlink Business, Starlink Residential, and Starlink RV.
The latter is the roaming version of their service that enables subscribers on the move to access the internet.
Although Starlink RV is quite expensive than the stationary service packages, it comes with many perks worth the price.
For instance, it ensures you can access fast and reliable internet even in the most remote part of the US.
Starlink RV internet speeds are way better than the LTE speeds of cellular network ISPs such as T-mobile and Verizon in remote areas.
Nonetheless, a Starlink RV user pays $25 more monthly than a residential user.
Starlink Kit – Basic Set-up
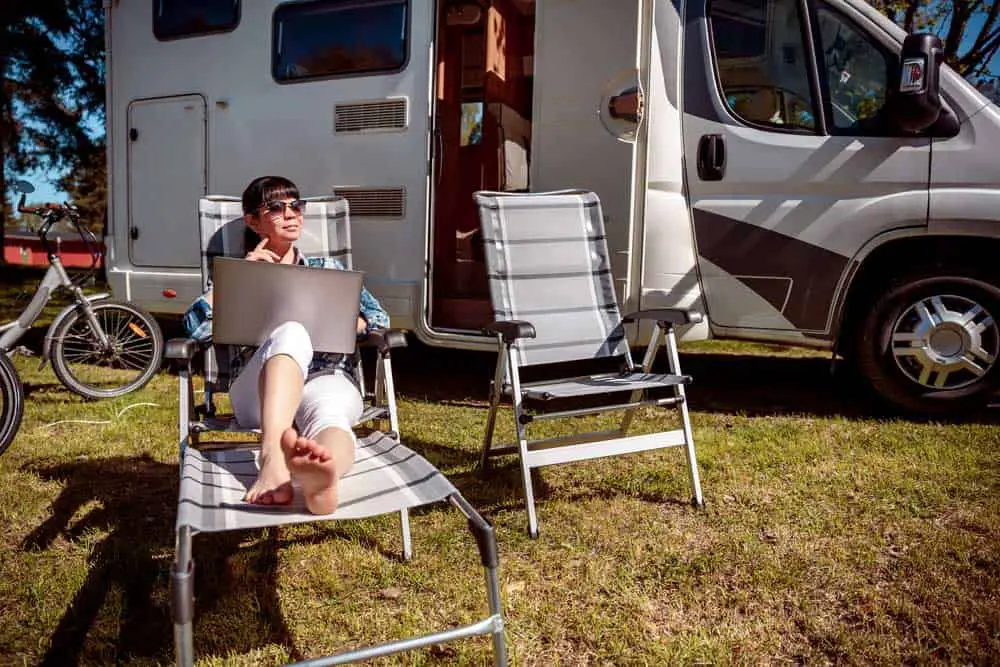
Working remotely on an RV.
Below are the components you’ll find on the Starlink kit.
- Starlink Dish. It could be the conventional Dishy McFlatface or the new flat high-performance dish. Both dishes can receive a signal from the satellites, although the newer model is better as it guarantees top speeds even during motion.
- A Router
- Kits power supply system
- A tripod stand
- Connecting wires
Starlink delivers the package with the Dishy McFlatface ready for use as it’s fully wired.
How to Install Starlink RV?
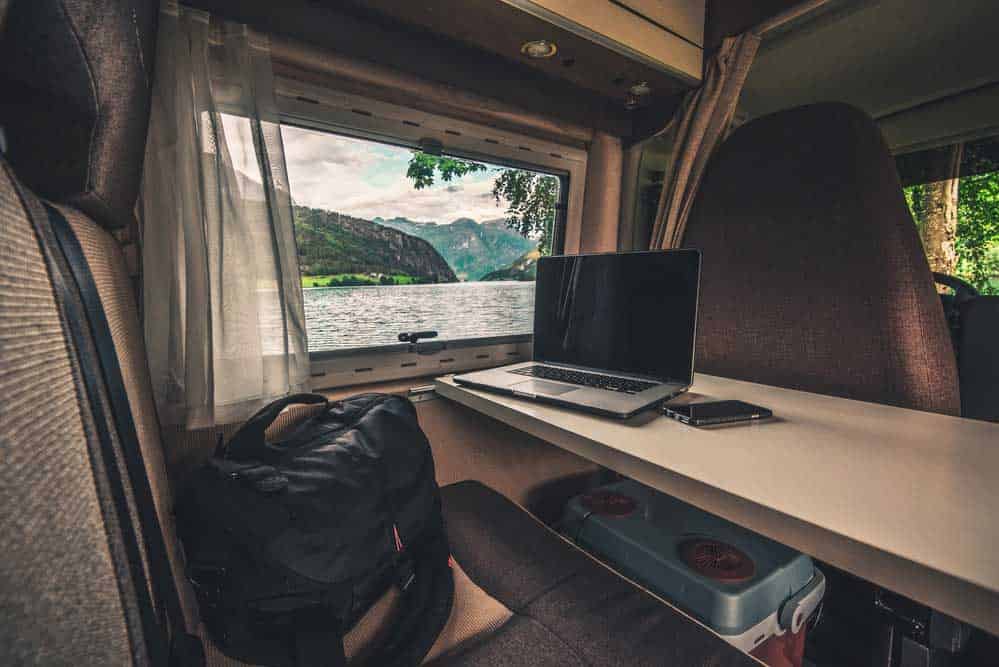
Working Remotely.
The rule of thumb when setting up Starlink RV is to ensure you have a clear view of the sky.
The Starlink app will come in handy in helping you identify the right positioning.
Also, you need to collect the components you need for the installation.
Mount the Dish

Starlink Dish.
Using the tripod stand, you must set it up on the ground for stability.
Nonetheless, ensure that you don’t set up the tripod stand very close to your RV, as this will impact the line of view of your dish.
Alternatively, you can also set up your dish on your RV roof.
Installing the Mount
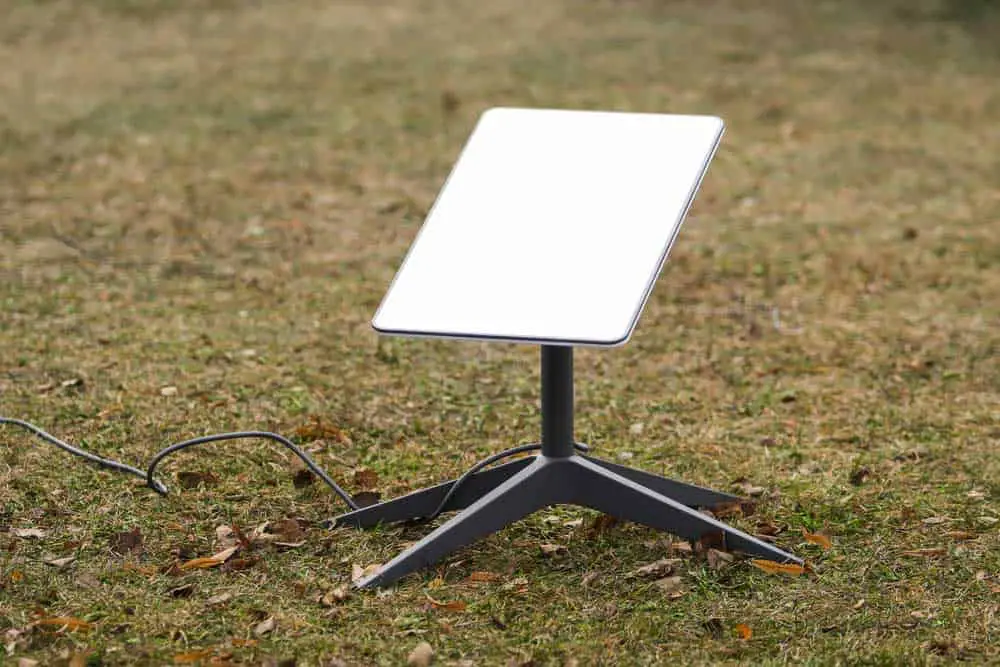
A Starlink Antenna on the Ground.
Rather than place your dish on the ground where it will not be well exposed to receive maximum signal.
The best option is to go for a telescoping pole mount.
Preferably, go for the 20′ Harbor Freight flag pole with an adapter to reinforce the grip of the dish on the pole.
Nonetheless, when installing your mount, don’t place it so tall that its shadow blocks the RV solar panel from accessing sunlight.
Ideally, you should ensure that the highest point of the mount is at level with the RV’s roof.
The installation process is simple, as you only need to slide the dish on the wide end of the pole.
If It doesn’t fit perfectly, you can use an adapter or reinforce its grip with a U-clamp or zip tie.
Mounting the Router.
The Starlink RV router broadcasts signals wirelessly, ensuring you can connect to the internet whenever you’re close to your rig.
The router is also responsible for transmitter power to Dishy.
Therefore, you only need to connect your router to a 110V power supply and wire a data cable to the dish. It is also the cable responsible for sending power to the dish.
The best mounting option is to position your router centrally to ensure you can access the internet anywhere from your RV and the vicinities.
There are two main ways to install your router:
Installing the Router Internally
You may opt to have your router inside the RV, requiring you to drill a 3/4″ hole in the vehicle to pass the data cable.
Fill the hole with a foam filler to ensure it is not easily noticeable.
Also, ensure that you strategically make the hole at a point where it is convenient to store your cable while your RV gets moving.
Installing the Router Externally
The Starlink router will withstand exposure to water thanks to its IP54-rating, meaning that it’s harmless to set it up outside your RV.
The advantage of this option is that you don’t have to drill a hole in your RV where the data cable from the dish to the router passes.
Instead, you can simply drop it from the top of the RV (where the Dish is located) to the router.
But again, this raises the router power source problem.
But you can draw power from the RV to the router via an extension cable.
Starlink RV Electrical Wiring

An RV.
You will need a waterproof side wall adapter on your RV to quickly connect and disconnect your Dishy to power.
It means you also need a cable running inside that draws power from the RV’s main power source to the side wall adapter from where you can connect your dishy.
Also, it would help if you create a switch to ensure that your router power on only when necessary.
It will save energy, which is important, especially considering that RVs operate on solar power.
Wiring the Data Cable
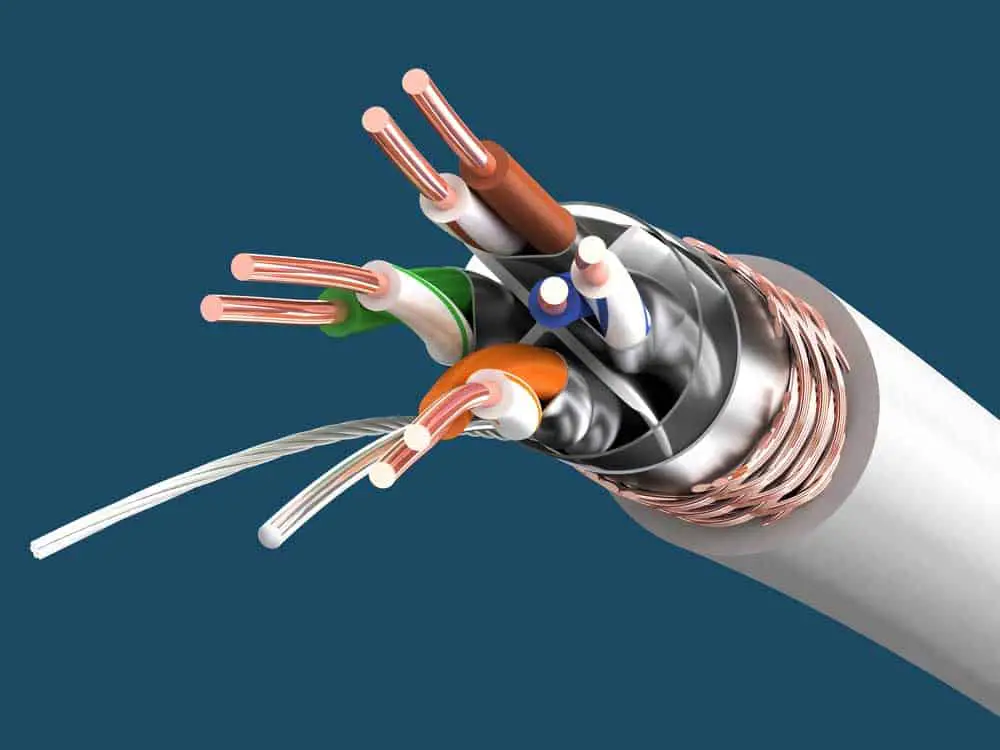
Cable SSTP cat6a (Twisted pair).
Lastly, creating a router connection to Dishy would be best via a data cable.
You can use a 75′ or 150’ cable, depending on the necessary length.
Either end of this cable features proprietary ends from which you can link one end underneath Dishy’s base arm and the other to the router’s base.
The cable’s design and the location of the connection port on the dish are such that you can seamlessly connect it without tampering with the mounting.
Lastly, as earlier captured, this cable is responsible for delivering power to the Dish, serving two purposes.
It is referred to as the Power Over Ethernet (POE), and it’s imperative in ensuring you just need to connect one cable.
Test your connection
Once all is set, switch on the power and log in to your Starlink account on their mobile app.
Then allow the router some time to connect to the internet.
Once it stops blinking, that’s a sign that it has established a connection so you can start using the internet to browse.
How to Troubleshoot Common Starlink RV Installation Issues?

Contact support if all troubleshooting attempts fail.
Here is a simple way to troubleshoot if your Starlink RV router can’t connect to the internet.
- First, check your wireless router configurations. Are all the router ports that need to be open in that state? Also, your Starlink RV is not receiving a signal, probably because the antenna is not well connected.
- How strong is the internet signal? You need to check the internet speed and signal, which could be why you cannot connect to Starlink Internet. Incorrect positioning or obstructions of the satellite antenna means it cannot receive a signal.
- Also, if your cables are loose or not connected, your Starlink router cannot communicate with Dishy.
- If everything is okay and your Starlink router cannot connect, you should consider resetting it by unplugging and plugging it back.
- Finally, if no measure still works, contact Starlink support.
Conclusion
That’s all on the installation of Starlink RV on your vehicle.
Most importantly, consult a professional to help you with the installation process if something is unclear.
For instance, you may need assistance drilling your RV to pass the data cable from Dishy to your router.
